
How to Create a Master Timeline in Asana
The short of it
Most people and organizations need a quick and easy method for understanding everything that’s happening across their teams. Calendars, spreadsheets, and many project management tools are often inadequate – for reasons largely centered around ease of use, collaboration, scalability, and integration. However, there is a way to visualize everything that’s happening across your organization, all in one place, with the same system your team may be already using. So, let’s get a little meta with Asana’s timeline feature.
Yes, this assumes that you’re already using Asana. If you’re not, I highly recommend it. I’ve spent a lot of time evaluating management solutions, and Asana is the best by far. Drop us a line if you want to know more, or start your account in the meantime.
A quick case study
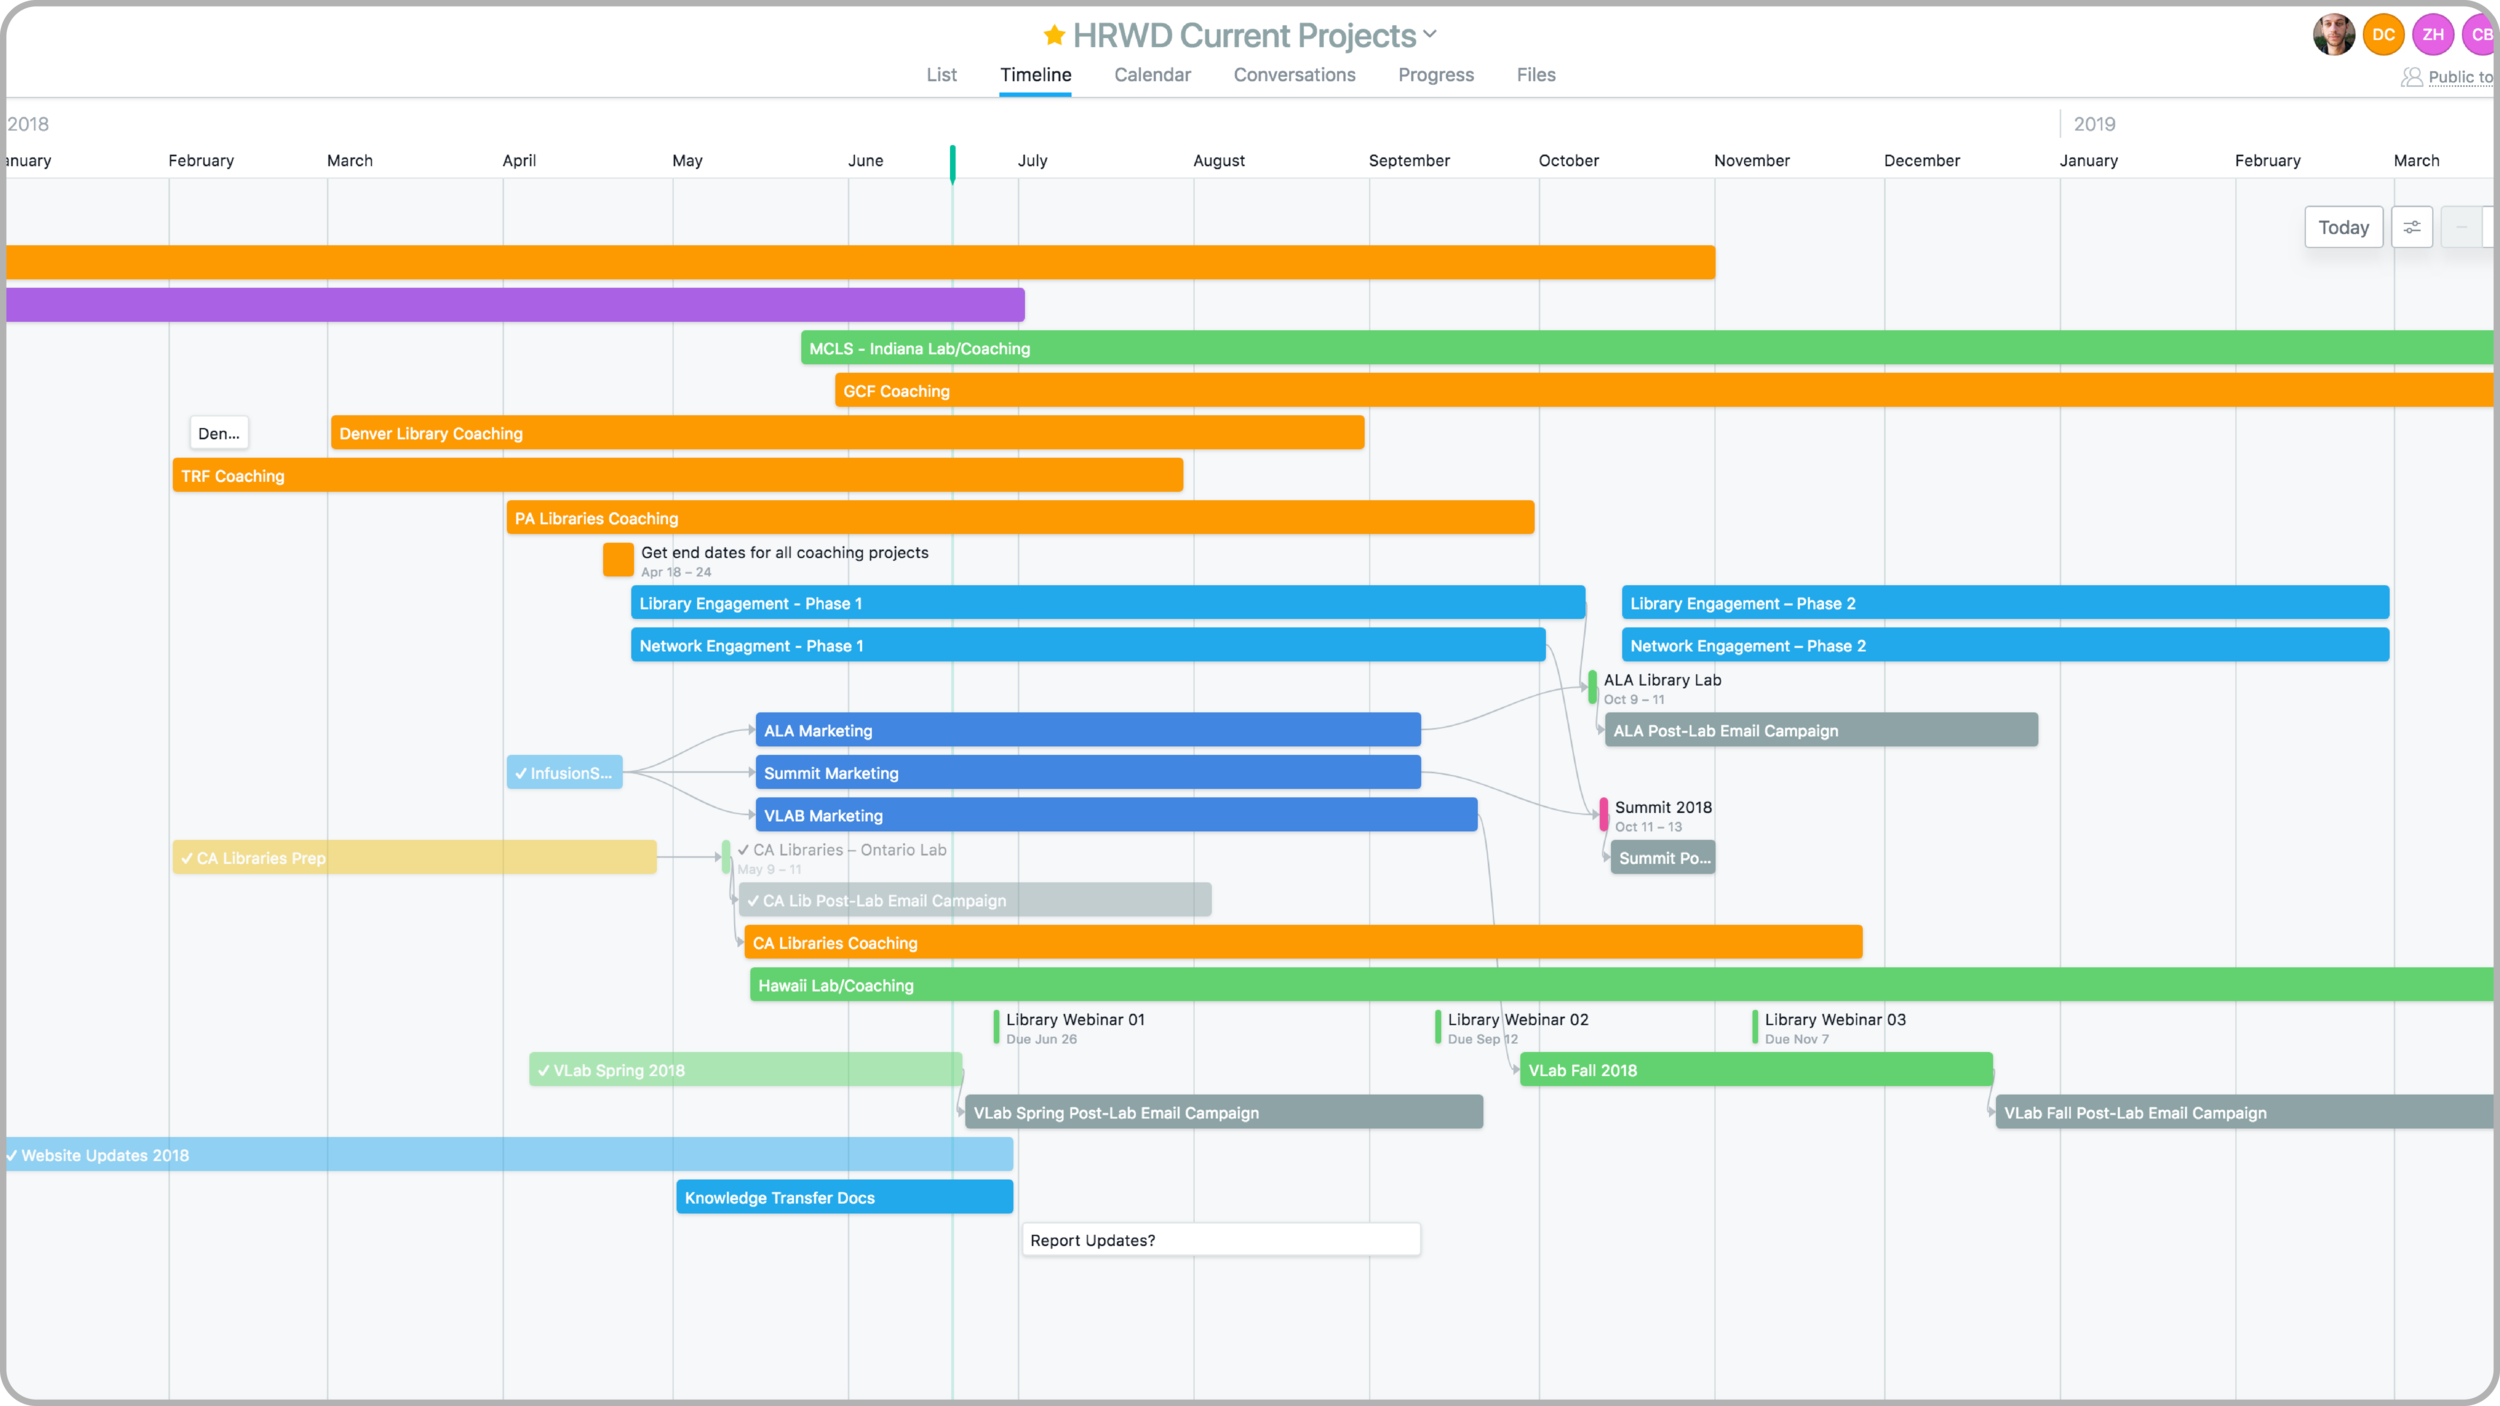
An example of the master timeline in action. Each color represents a different work stream.
A few years ago, I implemented Asana for the The Harwood Institute. Part of the challenge was not just streamlining and managing day-to-day work but also providing a high-level perspective for leadership. This challenge led me to create something outside the box: a master timeline that is coded by area of business. Our implementation allowed The Harwood Institute’s leadership and staff to see their goals and projects on the same page for the first time ever.
How to create your master timeline
Let’s get started.

1. Start a new project in the appropriate team. Name this project something like [acronym or abbreviation] Master Timeline or Current Projects. You may also want to enable the option “notify me of changes”.

2. Within this new project, create a new task for every current project, program, or effort. Don’t worry about previous projects or tasks.
In many cases, you should create only one task per project – to represent the project as a whole. Projects that have extremely long timelines and/or major phases may be broken down slightly. For instance, real estate development might have a predevelopment, construction, and lease-up phase led by different people. A nonprofit may have a strategy phase and a marketing phase for a development project. An event may have logistics and marketing tasks that run in parallel leading up to the event, followed by a social media campaign. In these cases, you would create a task for each major phase of the project, with each phase typically led by a different person or department.
I encourage you to start with everything in one place; however, you can separate internal and external work into separate master timelines, if you want. Any task in Asana can be assigned to multiple projects, and consequently, you can always have a single task appear in both timelines rather than duplicating work or creating confusion.

3. Set the start date as the time point at which the project commenced, and set the due date as the time point at which you estimate the project will be fully completed.
Pro tip: Open a second instance (a new window or tab) of Asana, copy each project link, and paste the link into its corresponding master timeline task description for greater accessibility.


4. Set dependencies via the task’s menu or by dragging the connectors in the timeline view.
5. Create custom fields to tailor the manner in which Asana presents your work. Here are some of my favorites:
Team – Create a drop-down custom field for each department or team. Try Admin, Development, Marketing, Design, etc.
Work Type – Create a drop-down field for your team’s business streams. Try Marketing, Development, Systems, Design, Production, Consulting, Admin, and Event.
Status – Use a status to communicate, sort, search, and report. Try Not yet started (grey), In progress (blue), Ready for review (yellow), Blocked (red), and Completed (green).
Priority – Stay focused. Try Critical (red), High (green), Medium (orange), Low (yellow), Backburner (grey).

6. Create two sections: Current Projects and Completed Projects. Place all of your projects in Current Projects.
7. Create three rules:
When a task is completed, move the task to the Completed section.
When a task is moved to Completed, set the status to Completed.
When a task is moved to Completed, set the priority to Backburner.
8. Navigate to the timeline view. Sort by “none” or “assignee” to best visualize the current situation. Assign colors by Department or Work Type to see where projects lie in your organization. Change the time scale to what’s best for you, and set the default view for everyone.
Pro tip: You may want to return to the list view, and set it as the default. By doing this after you have set a new default for the timeline view, you will retain that preference when you navigate back.
9. Notify your team —if you haven’t already — that you’re about to assign them tasks in the new master timeline project.
It is important to communicate that this timeline is provided for overseeing the big picture, not for managing the details of a given project.
10. Assign tasks to the appropriate person. Note: This is not the same as creating a project and assigning an owner.
The master timeline’s tasks should be marked for later in your teams’ My Tasks.
You may ask some project members to comment in order to ensure that only leadership can make changes, or you may wait until this resource has been deployed to the whole team
11. Check in with each project owner to ensure you’re continuing on the same page.
There you go! You should now have a master timeline of all tasks and projects for you and your team.
Bonus: Using milestones
Milestones are a great way to represent key inflection points in a project and/or organizational goals. Use milestones in the master timeline to communicate how each project and effort relates to those goals. For instance, the milestone Launch New Website or Annual Gala may have dependencies across departments and projects that are now visualized and transparent.
Double Bonus: Make your timeline part of your meetings and check-ins
Ensure that you’re on the same page as your teammates by using the master timeline as a way to contextualize efforts and the impact of your work. If timelines are starting to slip, you will immediately see their effects as time compresses toward goals and milestones. It is important to be realistic about timelines and milestones, but effective communication is what will get you across the finish line.
Need help getting started? Get in touch or use my referral link ›
Hire The Collaborative to plan, implement, and improve your systems and workflows ☀️
Our team loves systems and process challenges. We help refine workflows, train you on best practices, and implement new apps. Connect with us to learn more!


